AC Installation in Kukatpally : We adhere to a simple and straightforward air conditioner installation process that leaves zero room for error. However, we completely understand the fact that proper installation is always needed for an Air conditioner to show its optimal performance. Our technicians are well-versed with different model specifications, which allows them to install your AC in the most convenient way possible. Any error of judgment while placing your air conditioner can hamper the entire performance of the unit.
We believe that you should live a comfortable and convenient life by having complete access to an AC unit at all times. This becomes even more essential when you’re living in an area dominated by tropical climates.
Find the Below Procedure for AC Installation in Kukatpally
1. Choosing a spot for installation
When it comes to split AC installation, the most essential thing is choosing a wall strong enough to withstand the jerks and vibrations caused by the unit. It becomes even more crucial if you are placing the indoor and outdoor unit on the same wall.
A Strong and robust wall will reduce the effect of vibrations in your building structure, ensuring safety for you and your loved ones.
Moreover, we always try to place your AC a minimum of 7 feet above ground to ensure the perfect placement that makes it easy to service and maintain.
2. Mounting the plate and drilling a hole
Mounting the plate at zero degrees is crucial. It ensures that your AC rests flush against the wall. We stick towards using a spirit level and measuring tape to ensure that zero-degree angle.
Once done, we can start drilling holes for wires and pipes and connect the two units.
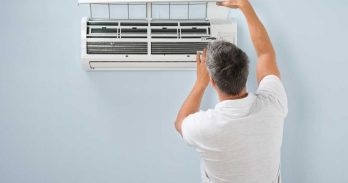
3. Placing the indoor unit
It’s time to mount the indoor unit. First, we remove any kind of cover that could be used for protection. Next, we would gently lift the unit towards the mount, run the wires and pipe out of the holes and start screwing it into place.
We always ensure that your copper pipes do not contain any sharp bends for optimal performance.
4. Choosing a spot for the outdoor unit
When placing your outdoor unit, we ensure that there is a distance of thirty centimeters between the wall and machine. This will guarantee that your AC gives a top-notch cooling performance.
Moreover, a spot without direct sunlight is prioritized to ensure the AC performance your manufacturer promised.
5. Some more screws
It’s about time that your outdoor unit sits on the wall. However, before we can do that, we drill holes for the holding brackets.
Once done, we will lift the unit and screw it tightly to ensure a strong fit. Holding brackets helps in holding the unit tightly against the wall.
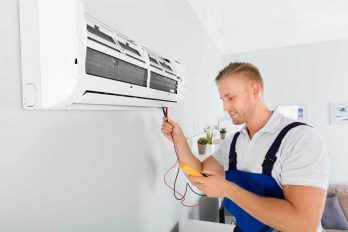
6. Time for the wires
Since both the units are placed, we need to connect the wires now. If there are any connections to be made between the two units, we will start with that. Next, we will connect the main power supply with the electrical ports of your house.
A connection diagram, if provided, is used to follow the manufacturer’s instructions.
7. Copper wires connection
Using a vacuum pump, all the copper wires are connected to each other. Once done, flair nuts are closed, and the gas valves are opened to get the gas flow running.